Page 2 of 4

Google Science Journal

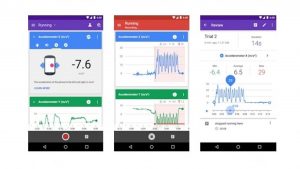
Google Science Journal was a completely new tool for me, which was awesome! I always love coming across something new in an area that you thought you were quite educated in (like Google). As a future teacher candidate, these are the tools that I really appreciate being introduced to in the classroom so that I am able to work out the kinks and get familiar before I’m up in front of a class!

As Google says, “Science Journal ‘transforms your device into a pocket-size science tool that encourages students to explore their world.” Pretty cool, hey? I thought so! Google Science Journal works as a cloud-based program and is suitable for grade K-12 so it is super versatile! With the use of Google Science Journal, you are able to enhance the scientific experience with things like accelerometers and light meters, which can help with experiments, inquiries, and lessons!


The good:

  • Very interactive
  • Eco-friendly!!
  • Can be time-efficient for teachers
  • Always students to explore
  • Facilitates inquiry-based learning
  • FREE
  • Creativity
  • Enhance lessons

The bad:

  • Not every student has a smartphone and you cannot assume they will
  • Not all student thrive with technologies


As a future teacher, this app really excites me. I think that students would have the opportunity to fully engage and the different tools are plentiful and effective. I look forward to exploring it further and have downloaded it on my phone to do so! My goal would be to implement this app during a practicum lesson if applicable!

Bulk Barn!

One of the best ways you can go zero waste is by eliminating unnecessary packaging! At the grocery store it is so easy to purchase items that come double wrapped in plastic just to make poritoning easier. Oftentimes you will also notice that the amount of packaging to the amount of food inside is quite astonishing. We have made it normal in our society to accumulate heaps of waste and garbage for small portions of snacks.

So how do you end this plastic-waste-food-cycle? The answer is really quite easy – prepare! In order to eliminate your waste, you’re going to have to put in a few extra minutes before you run out to the store. You’re going to have to put in a few extra minutes to wash out your old jars once they’ve been used. And you’re going to have to put in a few extra minutes when you are making your grocery list so that all items can have as little waste as possible!

Bulk Barn is a fantastic solution because they are well known and fairly common. They have a wide variety of snacks, staples, and so much more! They allow you to come for what you need, and not waste what you don’t. Now you may be thinking, what about the plastic bags you put your bulk items into? That’s where the solution comes in!

BYOC. Bring your own container! When coming into Bulk Barn all you have to do is weigh the jars that you are bringing in and write their weight down. Then fill away and the cashier will take of the base weight at the till! This means you are bringing in jars that would have potentially been garbage themselves and saving a plastic bag! It’s really a win-win. The BONUS is, likely the jars would be what you would have stored your goods in anyways so they are ready for the pantry as soon as you get home! 🙂

Zoom Presentation’s

This past week has been anything but relaxing. Tack on the stress of the semester wrapping up amidst the chaos – it is no wonder I found my self so easily overwhelmed! That being said, TechEd was easily able to switch to online instruction via the tools we used to present such as ScreenShare and Zoom.

Now at the beginning of the semester, I had a very tough time getting started with wifi in my new home in Metchosin. It’s beautiful, spacious, and quiet – but it lacks in good internet connection. I had immediately worried that I wouldn’t be able to connect to the Zoom group call as my wifi often isn’t strong enough to stream Netflix (I know, devastating).

My intuition was right and I immediately had connection problems on my laptop when trying to log on to the Zoom call. I then tried to download the app on my phone but no luck. Then in despair, I was texting a class member who suggested FaceTime. What a great idea! So she held me up for the 2 hours class was held on the Zoom chat so that I could be apart, and I even got to present while she held me up to the webcam. This to me is one of the ways that technology can really bring us all together.  I was able to think on the fly of different programs I could use to make it possible for me to join our virtual class. I believe that this is something that all teachers deal with when technologies do not work or fail in front of their classes while teaching! I learned to stay calm and brainstorm with peers how to make things work in alternative ways. This mishap provided me with some real-life experience that I am sure will help me in my future teaching career. AND I have zoom now installed on all of my devices ready to use when my wifi wants to cooperate!

The pros to having less internet connection? In this time I have been able to read 3 whole novels (outside of class readings)! Something I never could have thought possible. From this hiccup, I was still able to see hoe zoom calls worked and was honestly surprised at how smooth everything went considering the odds that were against us. I want to say also that having a teacher like Rich is extremely helpful. He is supportive and understanding and ultimately makes sure that all students are able to get the most out of the technology we are using to help them in their future careers. So thank you, Rich! You have made even the most uncertain of times feel manageable in terms of workload and support!

Smart Boards Presentation Week

Lily, Jahniaa, & Cassidy

After many weeks of research, our group inquiry on SMARTboards and implementing them in the classroom has come to an end. We have explored three key questions such as: what is a smartboard? How much do they cost? How can we use them in the classroom? What are some tips & tricks to navigating a SMARTboard? And of course, with most technology comes pro’s and con’s, so we explored some of the great features and some things to be cautious of when using a SMARTboard. 


So what is a SMARTboard? The SMARTBoard, also known as the Interactive Whiteboard, was developed by SMART technology and introduced in 1991. SMARTboards look very similar to your average whiteboard except they have the added advantages of a touch-controlled screen that works in connection to your computer and a projector. SMARTBoards use a resistive technology, meaning there is a small air gap between the board and resistive material, that allows users to press on the board with a pen or a finger and it will respond as a desktop mouse would. SMARTBoards can be written on with the use of digital ink to underline, highlight, circle and write with. When a pen is removed from the colour slot, the tray senses what colour has been selected and the colour will correspond on the board! 


How much do SMARTboards cost? On the SMARTboard website, the boards range from $2800 – $13700. This price on a teacher’s salary is not likely something that teachers would be able to purchase for their class themselves. Luckily, there is funding that exists for this type of technology! Some examples are as follows: 

  • Best Buy has grants available specifically to fund the price of technology in classrooms. They believe that technology in the classroom helps to develop students’ confidence and creativity”, which is why they want to help teachers to be able to afford these technologies. 
  • PAC grants are another option for funding. Teachers can advocate to the Parent Advisory Council (PAC) in efforts to have them apply for funding. These grants are not specifically for technology but can be used in such a way

There are a variety of ways you can implement the use of a SMARTboard in a classroom. SMARTboards are great for taking lessons online and enhancing them with technology. This can be done with powerpoint, google slides and/or video lessons. SMART tech offers a resource called LAB (Lesson Activity Builder https://www.smarttech.com/products/education-software/smart-learning-suite) which offers 6 core activities and allows you to customize them to your needs. SMARTboards are also great for group activities in the morning or brain breaks in the middle of the day! Those are just some of the many different ways you can enhance lessons and engage your students with a SMARTboard in the classroom.

What are some tips and tricks to navigating a SMARTboard? Well there is no doubt that using a SmartBoard can be a little intimidating at first! For years education has relied on chalkboards or whiteboards as classroom necessities, so a SmartBoard is a big jump from that. When getting started, it is important to remember that there are so many resources readily available to help you be able to use a SmartBoard to its full potential. Simple online instructions will be able to assist you in things like changing the SmartBoard pen size, accessing templates, erasing large areas, preparing presentations, and more! Once your board is installed, simply find what software it uses and you can easily google any question you may have. Something very useful I also found were the YouTube videos that users have uploaded to give you a virtual tutorial. From watching these videos you can get a clear idea of how to execute the feature you are looking for, and they often offer additional tips and tricks along the way! Once a video tutorial is searched, related videos will then pop up in your suggested area which allows for further research and exploration. All in all, SmartBoards have many incredible features that can assist learning in tons of different ways! Make sure you are giving yourself time to access different online resources for your particular software so that your SmartBoard can be efficiently used in class, and you aren’t missing out on its potential!

As most forms of technology usually do, SMARTboards had a various list of pro’s and con’s that could influence one’s decision to purchase. Making this list allowed us to better understand what kind of clientele SMARTboards cater to and how much time and money you would have to invest to have one in your classroom. They are very interactive which means students’ learning experiences can become more motivating, accessible, and engaging. SMARTboards offer many different features that can make them adaptable to most lessons and useful for many different learning occasions. SMARTboards are compatible with different kinds of technologies which make them a technologically advanced tool and also a very efficient classroom resource. In turn, SMARTboards may not be a practical wish for all schools due to their high cost. With the initial price also comes installation, maintenance, tech support, and add ons or tools. Due to these factors, many schools could not be in a financial position to buy one or more SMARTboards which could create inequality in students’ learning experiences. Schools must have access to the internet and proper power sources in order to operate a SMARTboard, which unfortunately does not make them accessible across the world. All things considered, SMARTboards can be an excellent learning tool if you have the means to purchase and maintain one. Although the cost is high and sometimes unmanageable, SMARTboards would be a great product to be fundraised for or gifted to schools that have smaller budgets!

Overall, all of us agree that having access to a SMARTboard can be a great asset to many different classrooms. When used correctly, they can provide enhanced learning opportunities that promote teamwork, engagement, and interactivity. Although we understand purchase may not be feasible for all budgets, those that can manage the initial price can use their SMARTboard for many years to come. Additionally, there are many different resources that can help to assist educators in using the many features SMARTboards offer. When used to their potential, students can benefit from the tools and features that can make their learning experiences more efficient and motivating. As future teacher candidates, we all would hope to have a SMARTboard in our classrooms one day and are eager to learn how to use them. From our inquiry research we believe we have built a strong foundation of information to help us in moving forward, and look forward to using them one day soon! 

Here are some of the resources we found really helpful when doing our inquiry:


Sources:

https://www.teachhub.com/technology-classroom-benefits-smart-boards

https://www.smarttech.com/Products/Education%20Displays

https://www.eztalks.com/whiteboard/disadvantages-of-interactive-whiteboards.html

EdTech Blog – Screencastify & Audacity

Today we had the opportunity to download and explore two applications with very useful functions! As we are furthering our journey in teacher educaiton, it is great to develop new skills for new programs that will help us in future classrooms and practicums!

The first program I was able to play around with is called Screencastify. This application allows you to record your screen with use of microphone audio and webcam and screen recording. The screen recording is something I hadn’t used before and I thought that was the most handy and exciting tool to get to know! With this, you could record many different lessons and info segments, as well as use as a tool to catch students up if they have been away or had to miss classes. This would definitely be something I would use in my classrooms. There is also the added factor of having your tabs and ads being recorded, which could be distracting for students. Screencastify would be a great tool for grades 6-12 to record projects, as well as update said grades on missed work. This app could also be used to give parents tutorials on any tech apps that they are using such as FreshGrade.

As for grade K-5’s I think that this could be used to explain different areas of reserach and would inhibit inquiry based learning! I wonder if students would be able to put together a project with Screencastify and properly construct something for class material. It would  be an effective way for students to present in from of the class that would potentially ease stress and nervousness of public spekaing, to ease students in to speaking in front of the class.

Additionally, I was unable to get my microphones paired to this software (despite my efforts and troubleshooting) as you can tell in my video below! I found it moderately user-friendly, but everytime I went to connect it took me to a dead end link. All-in-all, I think this is a great tool as long as it is cooperating properly!

Week 3: Group Inquiry – Tips & Tricks

Week 3: Tips and tricks

Cassidy, Lily, & Jahniaa

Cassidy: Tips and tricks


There is no doubt that using a SmartBoard can be a little intimidating at first! For years education has relied on chalkboards or whiteboards as classroom necessities, so a SmartBoard is a big jump from that. When getting started, it is important to remember that there are so many resources readily available to help you be able to use a SmartBoard to its full potential. Simple online instructions will be able to assist you in things like changing the SmartBoard pen size, accessing templates, erasing large areas, preparing presentations, and more! Once your board is installed, simply find what software it uses and you can easily google any question you may have. Something very useful I also found were the YouTube videos that users have uploaded to give you a virtual tutorial. From watching these videos you can get a clear idea of how to execute the feature you are looking for, and they often offer additional tips and tricks along the way! Once a video tutorial is searched, related videos will then pop up in your suggested area which allows for further research and exploration. All in all, SmartBoards have many incredible features that can assist learning in tons of different ways! Make sure you are giving yourself time to access different online resources for your particular software so that your SmartBoard can be efficiently used in class, and you aren’t missing out on its potential!


(sources: http://tldsb.on.ca/smart/pdfs/sb_tipsandtricks.pdf https://www.youtube.com/watch?v=AAt7Yl–wQ8) 


Lily Pro: 

One benefit of SMARTboards is the low maintenance needed to operate them, and this of course is great news to any busy teacher! Unlike white or chalk boards, materials do not need to be replaced and the mess created by these boards are reduced. As well, SMARTboards allow you to keep the notes that were written during class instead of having to erase them at the end of the lesson. This helps students who might be falling behind to be able reference the notes, as well as to help the teacher keep track of where the lesson left off at the end of the day. SMARTboards are made easy to use, so every class can be enhanced through its use!


(source: https://www.teachhub.com/technology-classroom-benefits-smart-boards)


Jahniaa Con:

One disadvantage to using a SMARTboard in the elementary classroom is the visual impacts it could be having on a teacher’s students. It is important to keep in mind that not all students have fully developed vision and may struggle to look at a screen all day. SMARTboards require visual tracking which involves following a moving object or icon on the screen. This can be hard for young and underdeveloped eyes. Some signs to look out for in students who may be struggling to view the classroom’s SMARTboard includes: watering or rubbing of the eyes, visual fatigue, disruptive behaviour or lack of comprehension on SMARTboard lessons. (Source: https://www.brighthubeducation.com/teaching-elementary-school/68395-using-smartboards-when-students-have-visual-needs-or-impairments/ )


Midterm: Video & Blog!

As stated in my blog previous, this journey has been very challenging! While I have been trying to keep a positive attitude in sticking to my Musical Growth Plan, I also realized that this a personal experience. I have control over my success and how challenging I make this process for myself.  That being said, after giving a solid effort to put together the notes and of “O Canada”, I came to the conclusion that this was too big a commitment, or perhaps to difficult of a song to approach as an absolute beginner! So I began brainstorming, instead of getting discouraged, to find a song that met my novice needs but also incorporated the notes that I had already been learning and practicing. Then I found it – Happy Birthday! An easy and safe place to start for a beginner that also allows for success and mastery.

I promised to be kind to myself during this project, even though I am often my own worst critic and in the past I would have seen this demotion as a failure. Moving forward is all I am hoping to do, even if that means bumps in the road and a change to the original contract I made with myself. The good news is, I have learned through this half of the process that properly scaffolding your learning is so important – especially when learning an instrument!  I can confidently say that this is something I will be taking into my future classroom, and could have only learned its importance by experiencing it first hand. I will also now have a better understanding of different progress levels, and learning rates in different students. Everyone learns differently and at different paces, and that is ok! So from here, I will be posting a video of me playing “Happy Birthday”, a compilation of notes I have been practicing in preparation for recording “O Canada”,  but was unsuccessful in learning that quickly.

“Happy Birthday” consists of the notes: D, E, G, F, A, B, and C. Personally, I think that this a great place to start in terms of note difficulty, transitions, song size, and familiarity. So now that I have restructured my learning plan, I will be able to continue on the journey by adapting to what I need personally form this experience, and what realistic goals look like in the future. I will edit my hard copy of my Musical Growth Plan, and evaluate this after reviewing my Midterm submissions!

As I reflect back on our visit to Campus View, it is helpful to remember that these students started out very small, but with consistent practice and proper scaffolding, were able to play beautiful songs! This is something I like to keep in mind as I look forward to experiencing these moments with my future students!

Happy Birthday – Recorder Recording

P.S. Please excuse my sick self in this video!

SmartBoards: Week 2

Created by Jahniaa, Lily, and Cassidy 

HOW MUCH DO SMARTBOARDS COST? IS THERE FUNDING TO SUPPLEMENT THE PRICE?

On the SMARTboard website, the boards range from $2800 – $13700. This price on a teacher’s salary is not likely something that teachers would be able to purchase for their class themselves. Luckily, there is funding that exists for this type of technology! Some examples are as follows:

  • Best Buy has grants available specifically to fund the price of technology in classrooms. They believe that technology in the classroom helps to develop students “confidence and creativity”, which is why they want to help teachers to be able to afford these technologies.
  • PAC grants are another option for funding. Teachers can advocate to the Parent Advisory Council (PAC) in efforts to have them apply for funding. These grants are not specifically for technology but can be used in such a way.

(sources: Interactive Displays | Whiteboards & Flat Panels, Best Buy School Tech Grants, Frequently Asked Questions (FAQs): Parent Advisory Council Community Gaming Grants )

PRO

While SMARTboards may cost a large sum upfront, they have the power to reduce costs downline. For example, using a SMARTboard can reduce the amount of paper used within the school and minimize the costs that come along with printing multiple worksheets, assignments, course content and readings. With technology changing teachers are required to integrate more technology into the classroom. SMARTboards provide teachers with the opportunity to teach effectively and efficiently, which is hard to put a price on. These boards allow teachers and students to work collaboratively with multimedia resources such as PowerPoint presentations, video lesson, 2D & 3D virtual spaces. SMART technology costs a lot for a reason because it takes traditional methods of teaching and improves them by creating an effective 21st-century environment for teachers to teach and students to learn to the best of their abilities.

(source: https://www.edusys.co/blog/smart-board-in-classroom-advantages-and-disadvantages)

CON

It is no shock that the price of a SmartBoard could make them inaccessible for many classrooms. Funding is generally less than teachers would hope for, which could make the purchase of a SmartBoard a large and somewhat difficult decision. In some cases, schools may be able to afford enough SmartBoards for every classroom, whereas others may only be able to fit one or two into their budget. Due to the ever-growing push for more technology in the classroom, some students could feel as though their education is lacking because they are not being able to interact with a SmartBoard when other students are. This kind of imbalance can create inequality and biases throughout schools and districts, which ultimately can affect the students.

Additionally, there are also variables that need to be factored into the cost of a SmartBoard such as updates and repairs.  Much like our iPhones and laptops, SmartBoards will most likely require software updates and general maintenance to keep them up to speed. SmartBoards are such a large piece of technological equipment that daily use from multiple students is bound to lead to damage one way or another. Depending on the cause and measure of repair, techs and replacement pieces could also cost a fair price to keep classroom SMARTBaords in optimal daily condition. All of such must be considered when thinking about purchasing a SmartBoard for your school!

(source: https://sites.google.com/site/missmcintyresclassroom/disadvantages-of-smart-boards)

Zero Waste Journey: DIY Condiments!

This week I have had a few personal breakthroughs that have really encouraged me to keep trying to reduce my lifestyle waste! At times it can be very discouraging so I am happy to have had these small victories to keep things determined and positive.

A large part of approaching a zero-waste lifestyle has to do with what you eat and what you buy at the grocery store. In this day and age our food industry thrives on (over)packaged foods. It is know wonder why these products fly off the shelves — they’re easy! Additionally, whether we want to believe it or not, the meat and dairy industry are not great for our planets health. As someone who eats plant-based for a majority of the times, I wanted to look into how to make things at home at typically come in plastic at the grocery store.

My first culprits were a simple salad dressing, a tahini dip, and vegan mayo (yes, I said it). I am lucky to own a Magic Bullet, and found that I used it for all three dips. Each were made from products that came from glass jars/bottles (which I reuse for many different things!) and had 7 ingredients or less. Typically, in dressings, dips and sometimes even mayo, there are additives and nasty chemicals that hide inside. Often they are hard to understand because of their names and/or how the the nutrition label is organized, but for the most part we don’t need to be eating them. The best way to avoid unnecessary additives (that are also bad for the environment) and plastic waste, is to make your favourites at home!

For each recipe I searched options on Pinterest and had a great selection to choose from. I decided on ones that seemed healthiest and were made from products I had on hand.

The mayo was the most surprising. It’s main ingredient is something called aquafaba, which is the water form a chickpea can! I was able to make a soup with the chick peas and use every part of the can. Then I added apple cider vinegar, dijon mustard, maple syrup, sunflower and/or olive oil (I used some of both), and chilli powder. It turned out just like the real deal but with amazing additional flavour! I used a mason jar with a canning lid to store it and it will now last for 2-3 weeks!

All-in-all, I think this was a very easy to make these dips and they ended up tasting great! And most importantly, I was able to avoid all of the additives and plastic in the process. This has inspired me to make more things homemade that are typically store bought, as I think it is a great way to reduce your waste and increase your health! 🙂

My Recorder Journey: Pits & Peaks

Like all learning journey’s, there are bound to be ups and downs. I have been trying my best to keep up to my Musical Growth Plan and with less success than I would like, I realized that I just need to focus on trying my best! So far I have been successful with the majority of the notes for O Canada, but am struggling with playing them quickly and smoothly enough to the time of the song. That being said, it has been quite some time since I have exercised these skills and learned and instrument so I am trying to keep that in mind and stay positive.

Peak: 

Going to Campus View Elementary to observe a day of music classes was such an incredible experience. It really changed my perspective on this recorder journey and I have now have replaced my frustration with appreciation! Seeing the students play the recorder was so inspiring. I was able to see how easily they can be stored, distributed, and cleaned. I sometimes forget how capable young students are but was pleasantly reminded once I got to hear the grade 2 students play (incredibly well!). I am extremely grateful that we were given the opportunity to see recorders being used in the classroom firsthand.

Pit:

Time management is perhaps the hardest part of university. Between work, school, and housework, my to-do list can pile up pretty quick. I have found that I often have little time to spare during my day, and when I do my boyfriend is home from work! I think the hardest part is finding adequate time in my day where I can practice alone and not disrupt the rest of the house. Although I try my best to prioritize, it definitely is a struggle to keep up with all work loads! Through this experience I believe I have been able strengthen my organizational skills, which will most definitely help me in the years to come!

« Older posts Newer posts »